

A crisp, freshly pressed shirt changes everything about how you carry yourself. Whether you are stepping into a high-stakes client presentation, attending a wedding, or simply pulling your daily rotation together, knowing how to iron a shirt properly is an indispensable skill.
Yet, for many people, the process feels like an uphill battle. You press the front, turn to work on the back, and suddenly discover that your freshly ironed front panel is covered in new wrinkles.
Ironing does not have to be frustrating or time-consuming. The secret lies in understanding the natural geometry of the garment, managing heat and moisture, and following a logical sequence that prevents re-wrinkling. By following this complete method for how to iron a shirt, you can achieve professional dry-cleaner quality in under five minutes at home.
The 6-Step Sequence Summary
If you are short on time and need to know how to iron a shirt right now, follow this strict anatomical order:
-
The Collar: Open it flat, press the reverse underside from the tips toward the middle, then flip and repeat on the front.
-
The Cuffs: Unbutton completely, press the interior flat, then smooth the exterior avoiding the buttons.
-
The Sleeves: Align the underarm seams flat, smooth with your hands, and press from shoulder down toward cuff.
-
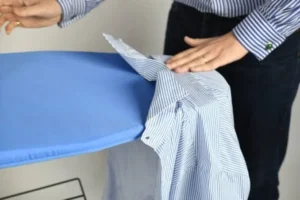
The Yoke: Drape one shoulder over the narrow tip of the ironing board and press from seam to center.
-
The Front Panels: Press the button placket first (from the reverse side), then iron the chest and front body.
-
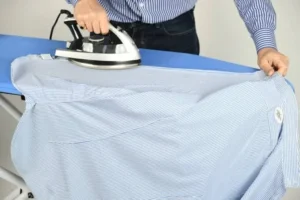
The Back: Lay the large back panel flat across the wide end of the board, working from the yoke down to the tail.
Essential Tools and Setup for Flawless Pressing
Before heating up your appliance, having the right equipment ready ensures safety and speeds up the entire job.
Steam Iron vs. Dry Iron vs. Garment Steamer
A quality steam iron is the workhorse of menswear care. While a dry iron relies strictly on heat and physical weight, steam penetrates deep into cellulose fibers, relaxing stubborn wrinkles with minimal friction.
A garment steamer is great for refreshing casual knitwear or sports coats, but it cannot impart the crisp structure needed on collars, cuffs, and plackets. For a proper button-down or formal shirt, a standard iron with a burst-of-steam feature remains irreplaceable. Look for a stainless steel or ceramic soleplate for smooth glide and even heat distribution.
Ironing Board Setup and Using a Pressing Cloth
Your ironing board setup forms your working foundation. Ensure the board is adjusted to hip height so you can stand comfortably without hunching your shoulders. A sturdy board with a thick, heat-resistant felt pad under the cotton cover is vital; a thin, worn cover allows the board’s metal mesh pattern to transfer onto delicate fabrics.
Keep a pressing cloth nearby. This simple tool, which can be an ordinary clean white cotton handkerchief or a dedicated piece of muslin, acts as a protective thermal barrier when pressing dark or delicate fabrics.
Water Selection: The Importance of Distilled Water
Always fill your iron with distilled water rather than standard tap water. Tap water contains calcium, magnesium, and dissolved mineral salts. Over time, these minerals bake inside the steam vents, resulting in chalky deposits and spitting rust-colored water droplets directly onto clean white shirts.
Temperature and Fabric Guide: From Cotton to Modern Performance Blends
Setting the correct iron soleplate temperature prevents devastating scorch marks and protects the structural integrity of your garments. Before beginning, always inspect the care label sewn into the inner side seam.
| Fabric Material | Care Label Symbol | Heat Dial Setting | Steam Level | Key Safety Precaution |
| Linen | Three dots (Hot) | Maximum (400 to 445 F) | High Steam | Must be thoroughly damp to release deep creases |
| 100% Cotton | Three dots (Hot) | High (350 to 400 F) | Medium to High | Press inside out on dark colors to avoid shine |
| Cotton-Poly Blends | Two dots (Medium) | Medium (300 F) | Low to Medium | Avoid hovering too long in one spot |
| Silk & Wool Blends | One dot (Low) | Low (250 to 300 F) | No Direct Steam | Always use a pressing cloth; never slide hard |
| Performance Synthetics | One dot (Low) | Minimum (200 to 250 F) | Steam Only / Cloth | High risk of melting elastane and polyester fibers |
Handling Modern Performance and Synthetic Stretch Fabrics
Today, many professionals wear performance dress shirts crafted from engineered synthetics like polyester, nylon, and elastane. Knowing how to iron a shirt made of synthetic fibers requires a different approach than traditional heavy broadcloth.
Synthetics possess low melting points. If you apply a standard cotton heat setting to a performance shirt, the fabric will glaze, puck, or melt directly onto your iron soleplate. Keep the heat on the lowest setting, leverage steam from half an inch away, and rely on gentle smoothing motions rather than heavy downward pressure.
Essential Pre-Ironing Preparation
Taking one minute to prep your shirt saves five minutes of corrective pressing down the road.
-
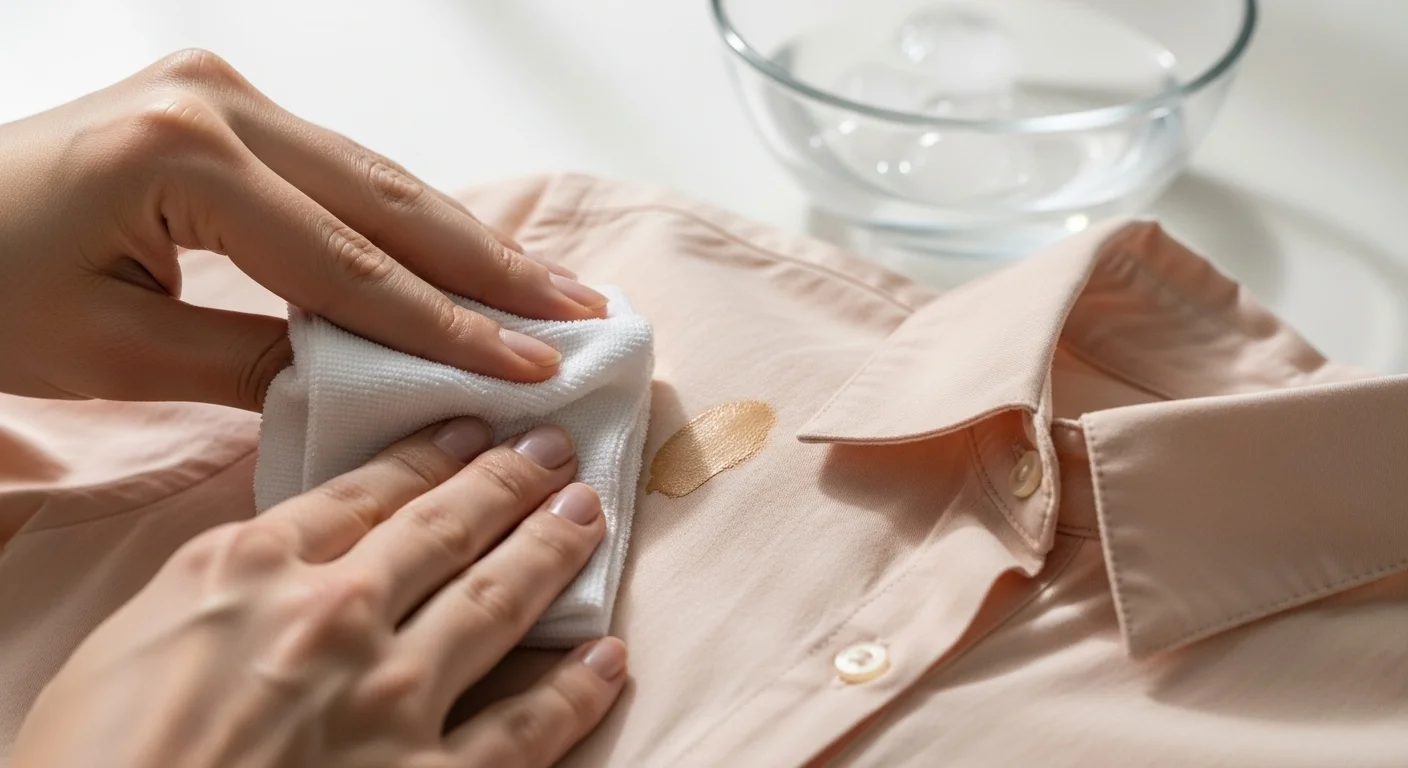
Check for Set-In Stains: Never apply heat to a shirt with residual collar grime, coffee spots, or underarm deodorant residue. Ironing heats up organic oils and turns faint discoloration into permanent stains. Ensure the shirt has been thoroughly laundered first.
-
Remove Collar Stays: If your dress shirt has removable plastic or brass collar stays, slide them out before ironing. Leaving plastic stays inside causes them to warp and imprint visible raised outlines on the outside of your collar. Metal stays can gouge fabric under pressure.
-
Unbutton Everything: Unfasten the main button placket, the cuffs, and the small gauntlet buttons located along the forearm sleeve slit. Attempting to press a buttoned shirt bunches the fabric and produces unintended folds.
-
Master the Moisture Balance: Dry cotton fibers are brittle and fight the iron. If you pull clothes straight from the dryer, iron them while slightly damp. If your garments are completely dry, use a fine misting spray bottle filled with clean water to dampen the shirt evenly. Roll it up for two minutes to let the moisture equalize throughout the weave.
The Correct Order of Ironing a Shirt: Step-by-Step Walkthrough
The foundational rule of ironing is simple: always press small, detailed sections first, followed by broad panels. Collars and cuffs hang freely off the edge of the board, meaning they will not wrinkle while you manipulate the large front and back body sections.
Step 1: The Collar
The collar is the most visible part of any dress shirt, framing your face and tie knot.
Lay the collar flat along the board with the backside facing up. Begin pressing at the outer collar points and glide the iron inward toward the center back. Repeat this motion on both sides. Working from the corners inward prevents the fabric from bunching into unsightly wrinkles along the collar edges. Flip the collar over and repeat the exact same motion across the front side. Never iron along the fold of the collar stand unless you desire an unnatural, overly rigid crease.
Step 2: The Cuffs
Cuffs receive equal visual attention, especially when wearing a suit jacket.
Unbutton the cuff completely and spread it flat on the board, inner lining facing upward. Press the interior first, gliding smoothly from edge to edge to establish flatness. Flip the cuff over to the exterior face. Carefully navigate the pointed tip of your iron around the buttons, pressing the surrounding fabric without running the hot metal directly over plastic buttons, which can scorch or crack. For French cuffs, open the double cuff completely, iron the fabric flat on both sides, then fold it along its seam and lightly press the folded edge.
Step 3: The Sleeves
Ironing sleeves without creating unintended railroad creases requires careful preparation.
Smooth the sleeve flat along the board with both layers completely even. Use the underarm seam as your alignment guide, smoothing wrinkles out with your hands before the iron ever touches the cloth. Start at the shoulder head and guide the iron down toward the cuff in long, steady strokes.
If you prefer a sharp military crease down the outside of your arm, press firmly right along the upper edge. If you prefer a soft, rolled, European-style sleeve, stop your iron half an inch short of the outer edge, rotate the sleeve slightly, and press down the center again.
Step 4: The Yoke and Shoulders
The yoke is the horizontal panel spanning your upper back and shoulders.
Slip the shoulder of your shirt over the tapered nose of your ironing board so the fabric rests naturally against the curved end. Press firmly across the top edge, moving from the collar base out toward the sleeve seam. Slide the shirt around the nose to finish the other shoulder, smoothing out the back collar attachment as you go.
Step 5: The Front Panels and Button Placket
Next, rotate the shirt around the board to handle the front body.
Begin with the front panel containing the buttons. To make the process fast and avoid damage, lay this strip facedown against the padded board and iron the placket from the reverse side. The thick padding of your ironing board allows the buttons to sink down into the cover while the iron presses the surrounding fabric completely smooth.
Next, turn the shirt right-side up, slide the tip of the iron gently between the buttons, and smooth the large chest panel down to the hem. Repeat the procedure on the opposite front panel with the buttonholes, gliding uninterrupted from shoulder to bottom seam.
Step 6: The Back Body and Pleats
Finish by placing the broad back panel across the wide portion of the board.
If your shirt features a center box pleat, press the flat fabric on either side first, then tuck the tip of the iron cleanly into the pleat to set a sharp fold. If your shirt has side knife pleats beneath the shoulder blades, press them flat in the direction they naturally fold. Glide the iron downward in smooth passes from the lower yoke seam all the way to the curved bottom hemline.
Once the back is complete, take a step back and examine the garment. This step completes the master sequence for how to iron a shirt cleanly without repeating work.
Sartorial Care: Protecting Mother-of-Pearl Buttons and Fine Weaves
When dealing with bespoke, made-to-measure, or high-end off-the-rack dress shirts, standard laundry practices must be elevated.
Fine luxury shirts constructed from high-thread-count cotton (such as 120s or 140s two-ply broadcloth) have tight, delicate weaves. Dragging a dry, overly hot iron soleplate across these micro-yarns can snap individual threads and weaken the fabric. Always introduce generous steam to let the moisture carry thermal energy into the weave gently.
Furthermore, luxury dress shirts feature genuine Mother-of-Pearl buttons sourced from natural shell. Unlike generic polyester buttons, shell buttons are brittle and sensitive to thermal shock. Running an iron directly across Mother-of-Pearl can shatter the button face or scorch the surrounding threads. Always maintain a quarter-inch clearance or press strictly from the rear face of the fabric.
How to Avoid and Fix Common Ironing Mistakes
Even seasoned hands run into occasional hiccups. Here is how to diagnose and correct common ironing problems quickly.
Preventing Scorch and Shiny Iron Marks on Dark Shirts
Dark garments like navy, black, and charcoal shirts are vulnerable to friction shine. This glossy sheen occurs when the weight of the iron compresses and glazes surface fibers against the hot soleplate.
-
Prevention: Always iron dark shirts inside out, or place a clean cotton pressing cloth between the garment and the iron soleplate.
-
Correction: If you notice a glossy spot, spray the area lightly with a 50-50 solution of distilled white vinegar and water, then hold a hot steam iron an inch above the spot without touching the cloth. The acid and rising steam will lift and relax the compressed fibers.
Reversing Accidental Creases and Puckered Seams
Accidentally ironing a crease into the middle of a panel happens when fabric underneath bunches undetected. Do not attempt to scrub it out with dry pressure.
Instead, hit the burst-of-steam trigger directly over the mistake, lift the iron, gently pull the fabric taut with your fingers across the grain, and press again with a smooth single glide. For puckered seams along the side panels, stretch the seam gently along its stitch line while applying steam to reset the thread tension.
Post-Ironing Care: Locking in the Press
Once you finish, what you do in the next sixty seconds determines how long your hard work lasts.

Freshly pressed cotton fibers are still warm and pliable. If you fold the shirt or throw it across a chair immediately, gravity and residual heat will introduce fresh wrinkles within minutes.
Always hang the shirt immediately on a sturdy wooden or broad-shouldered contoured hanger. Thin wire hangers bend easily and leave unsightly dimples in the shoulder padding. Fasten the top collar button and the third button down the front placket to maintain the natural balance of the chest. Allow the shirt to cool and dry completely for at least five minutes before wearing it or tucking it into a crowded closet.
FAQs
How do I iron a shirt without an ironing board?
If you are traveling or lack space, lay a thick, clean bath towel flat across a sturdy kitchen table, countertop, or desk. Smooth out all lumps in the towel before placing your shirt on top. The towel protects the underlying furniture while providing the necessary firm, heat-absorbing cushion to press wrinkles out cleanly.
Should shirts be ironed wet or dry?
Shirts should never be soaking wet, but they should never be completely bone-dry either. A slightly damp shirt is in the ideal state for wrinkle removal because moisture softens the natural cellulose fibers, allowing the heat to reset them flat with very light pressure.
Can you use spray starch on every shirt?
Commercial spray starch provides an exceptionally crisp finish, but it should be used sparingly. Starch builds up inside the fabric weave over successive washes, attracting dust and causing collar folds to fray prematurely. For regular wear, a light homemade sizing spray or plain distilled water provides plenty of hold without stiffening the cotton.
What is the difference between ironing and pressing?
Ironing involves sliding the appliance back and forth across the fabric, which can stretch or warp delicate seams if done aggressively. Pressing involves placing the iron down in one location, applying downward pressure, lifting it cleanly, and setting it down on the next section. Structured collar tips, pleats, and pocket flaps should always be pressed rather than scrubbed with sliding motions.
How often should you clean your iron’s soleplate?
Clean your iron whenever you notice resistance during glides, dark sticky residue, or mineral deposits along the steam holes. Wipe a cooled soleplate with a damp microfiber cloth dipped in equal parts baking soda and water to strip away scorch residue and restore a smooth glide.













Leave a Reply